

Preamble
It's obvious that some things happen too quickly for us to follow by eye. High-speed photography1 can help us understand them by slowing the action down to a human scale. It has helped us resolve whether horses' feet all leave the ground during a gallop, what happens when water drips into a glass, and study the explosions of everything from fruit to atomic bombs. Of course, to capture such videos we'll typically need very specialized and expensive equipment.
However, the opposite process can help us too: sometimes we perceive more by speeding up the action. Although it's clear that we're not getting more data, our brains somehow see more if the motion is fast enough.
Happily this sort of movie, a time-lapse video, is much easier to make. All we need is a camera, the means to trigger it on a regular basis, and some software to turn the photos into a movie.
The notes below document my own experiences in making such movies using a Canon EOS400D DSLR camera. There's very little novel here, but I wanted to note things down rather than have reinvent them next time I want do this.
Camera settings
Broadly speaking the camera lets us choose between automatic and manual. On automatic the camera tries to optimize the settings for that particular image: as a consequence successive frames in the movie might have different exposures and thus the film flickers. Thus we're naturally led to set the camera in full manual mode. Full here means aperture, exposure, ISO, and focus.
Normally I'm a fan of capturing full-resolution RAW images. In practice though with thousands of images this makes the post-processing unduly onerous. Instead then, when making movies I capture small (1936 × 1288) JPEGs. As a bonus these images are small enough (~1MB) that a single CF card is sufficient for most movies.
Control
Obviously a critical task is to trigger the camera on a regular basis, and pressing the shutter manually rapidly gets boring! Some cameras can be programmed to do this themselves, otherwise you'll need an intervalometer.2
The DIY route
It's easy enough to build an intervalometer, and I think this is the most enjoyable solution. You can see my design,3 or consult Google4 for many others.
The commercial route
Unsurprisingly you can simply throw money at this problem, and buy and intervalometer.
The Swiss-army-knife approach
It's quite likely that you've already got a programmable device lying around which could do the job. There are countless Arduino intervalometer hacks,5 or you could use a PC.6
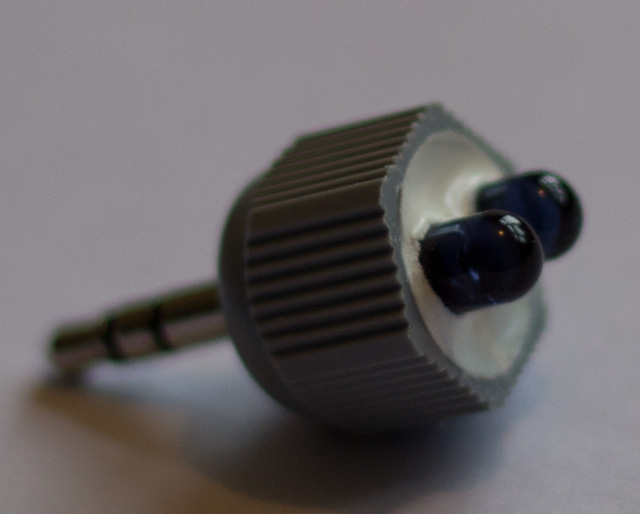
Perhaps more fun are those based around a mobile phone. I've played with DSLRbot7 on my iPhone. Rather than a wired connection, one attaches a couple of IR LEDs to the phone's headphone socket which signal to the camera's IR remote sensor.
As shown below, one can even enjoy the DIY thrill with this by making your own IR emitter.
Power
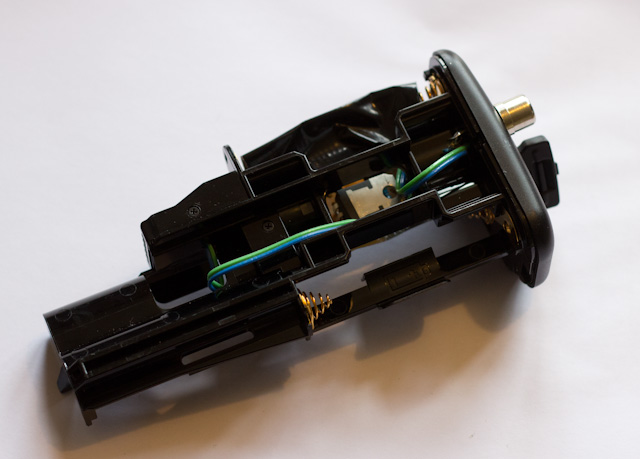
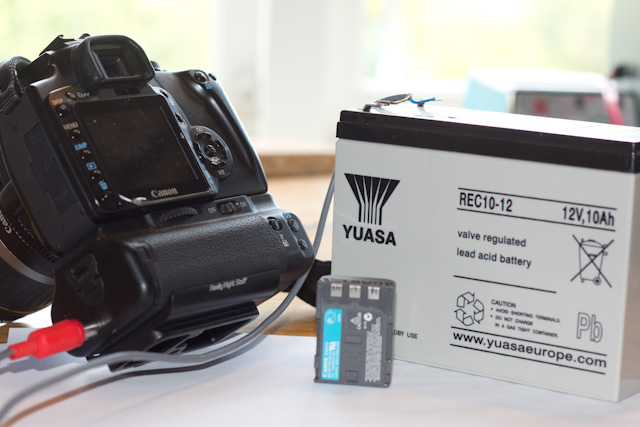
Taking many hundreds or thousands of images takes a lot of energy; enough to run down the small NiMH battery in my EOS400D anyway. Happily Canon make a battery grip which increases the capacity, but sadly this still isn't really enough. However, if you leave the batteries out of the battery grip, there's loads of space to fit a voltage regulator and a socket for an large external battery.
More specifically, the BG-E3 battery grip can take six AA cells. I a linear regulator around a LM317 on a bit of stripboard, which is then attached to the holder with a bit of gaffer tape. It's hardly the most robust design but it appears to work well enough.
When not taking a picture the camera draws about 130mA which falls to about 40mA if you disable the LCD display. The peak current when taking a (non-flash) photo is about 1.6A but I don't have a feel for the average value.
Canon rate the NB-2LH as a 7.2V 720mAh battery; the somewhat larger lead-acid battery I use now claims 10Ah!
Data processing
Finally when you've taken lots of images, one needs to convert them into a movie. I use a Mac, so iMovie is the natural choice. That works, but it seems quite slow.
In practice I think it's quicker and easier to combine the stills with ffmpeg8 and then use iMovie to add titles or otherwise edit the video.
Charles Martin Reid has written an article9 covering this, so I won't duplicate his notes here.
My only addition is a Perl program to arrange the files for ffmpeg.10 Rather than renaming things, my program sets up a directory of links to any JPEG files it finds, then invokes ffmpeg.
Explicitly I do this:
- Copy images from the camera's flash card to a new directory on the Mac.
- Run make-movie.pl.
- Look at a.mp4
Results
Clock Time Lapse
Each frame is a minute apart, so the second hand appears to stay still. See the full video11 on Vimeo.12
Clouds
The view from my back window on June day in Cambridge. See the full video13 on Vimeo.14
References
- 1. http://en.wikipedia.org/wiki/High_speed_photography
- 2. http://en.wikipedia.org/wiki/Intervalometer
- 3. http://www.mjoldfield.com/atelier/2011/08/intervalometer.html
- 4. http://www.google.com/search?q=diy+intervalometer
- 5. http://www.google.com/search?q=arduino+intervalometer
- 6. http://www.google.com/search?q=PC+intervalometer
- 7. http://www.dslrbot.com/
- 8. http://www.ffmpeg.org/
- 9. http://wiki.charlesmartinreid.com:8888/wiki/Ffmpeg
- 10. http://www.mjoldfield.com/atelier/timelapse/make-movie.pl
- 11. http://vimeo.com/27400773
- 12. http://vimeo.com
- 13. http://vimeo.com/27400494
- 14. http://vimeo.com
![[ Atom Feed ]](../../atom.png "Atom Feed")